This article is for those using a Code-Your-Own (CYO) campaign and provides tips for creating padding, margins, and email width.
Due to the nuances of HTML, it’s crucial that any person copying, adjusting, or writing HTML code is formidably experienced with HTML coding. We do not offer direct support for customer-created code.
How to create padding and margins in HTML
If you neglect to add padding or margins to your layout, your text and images will run into each other.
There are a few ways to write your code so this doesn’t happen. If you’re working at a <td> level, we recommend using style padding, such as <td style="padding:5px;">. If you’re working within <div> tags, it’s better to use margins like this: <div style="margin:5px;">.
We don’t recommend using the padding attribute in
<div>tags, because they will be stripped from Outlook 2007 and 2010.
Let’s imagine you’d like to pad an image box and you want different padding on the right side and on the bottom. For padding, try:
<td style="padding-left:0px; padding-top: 0px; padding-right:20px; padding-bottom:10px;">
For margins, try:
<div style="margin-left:0px; margin-top: 0px; margin-right:20px; margin-bottom:10px;">
Doing so will turn out with a larger space on the right side than on the bottom.

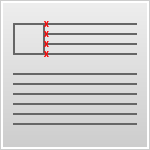
Sample code for a wrapping text box
Using <div> style margins:
<table width="100%" border="0" cellspacing="0" cellpadding="0">
<tr>
<td valign="top">
<table width="1%" border="0" align ="left" cellpadding="0" cellspacing="0">
<tr>
<td width="1%" valign="top">
<div align="left" style="margin-right:20px; margin-bottom:10px;"><img src="image URL here"/></div>
</td>
</tr>
</table>
<div style="margin-right:5px; margin-bottom:5px;">text can go here</div>
</td>
</tr>
</table>
Using <td> style padding:
<table width="100%" border="0" cellspacing="0" cellpadding="0">
<tr>
<td valign="top" style="padding-right:5px; padding-bottom:5px;">
<table width="1%" border="0" align ="left" cellpadding="0" cellspacing="0">
<tr>
<td width="1%" valign="top" style="padding-right:20px; padding-bottom:10px;">
<div align="left"><img src="image URL here"/></div>
</td>
</tr>
</table>
<div>text can go here</div>
</td>
</tr>
</table>
How to assign an email width
You don’t want to forget to assign width to your content areas. If you miss this step, your email’s width could vary greatly from email client to email client, based on the amount of content you place in each column. If you want the columns to be equally weighted, you would assign a column width of 50% to each, like so:
<table width="100%" border="0" cellspacing="0" cellpadding="0">
<tr>
<td width="50%" valign="top" style="font-family:Verdana, Geneva, sans-serif; font-size: 12px; color: #666666; padding:7px;">Lorem ipsum dolor sit amet, consectetur adipiscing elit. Cras risus. Nullam ipsum justo, ultrices at, laoreet interdum, sodales eu, mi. Duis sed enim. Etiam convallis.
</td>
<td width="50%" valign="top" style="font-family:Verdana, Geneva, sans-serif; font-size: 12px; color: #666666; padding:7px;">Lorem ipsum dolor sit amet, consectetur adipiscing elit. Cras risus. Nullam ipsum justo, ultrices at, laoreet interdum, sodales eu, mi. Duis sed enim. Etiam convallis.
</td>
</tr>
</table>
Which turns out looking like this:
