This article explains the different template options and the basics of campaign creation.
Creating a New Campaign
To get started creating a new campaign, follow these steps:
- Navigate to your Campaigns tab.
- Click on the Emails section in the panel on the left, if you’re not there already.
- Click on the Create new campaign button.
- In the pop-up window that appears, select Regular email and give your campaign a name.
- Click on the Continue button.
- Select a template or click on the Start from scratch button.
- If you chose to start from scratch, select Drag & drop in the pop-up window that appears and click on the Continue button.
Below, we’ll go into more detail about the different types of templates that you can use to create your campaign.
Template Gallery
After you’ve given your campaign a name, it will open the Template Gallery (step 6 above). The Template Gallery has different sections for you to browse, with different types of template options. If you see one that you’d like to use a starting point for your campaign, hover over it and click Start here.
Note: Depending on your account’s age, activity, and type, you may not see all of the sections described here in your Template Gallery.
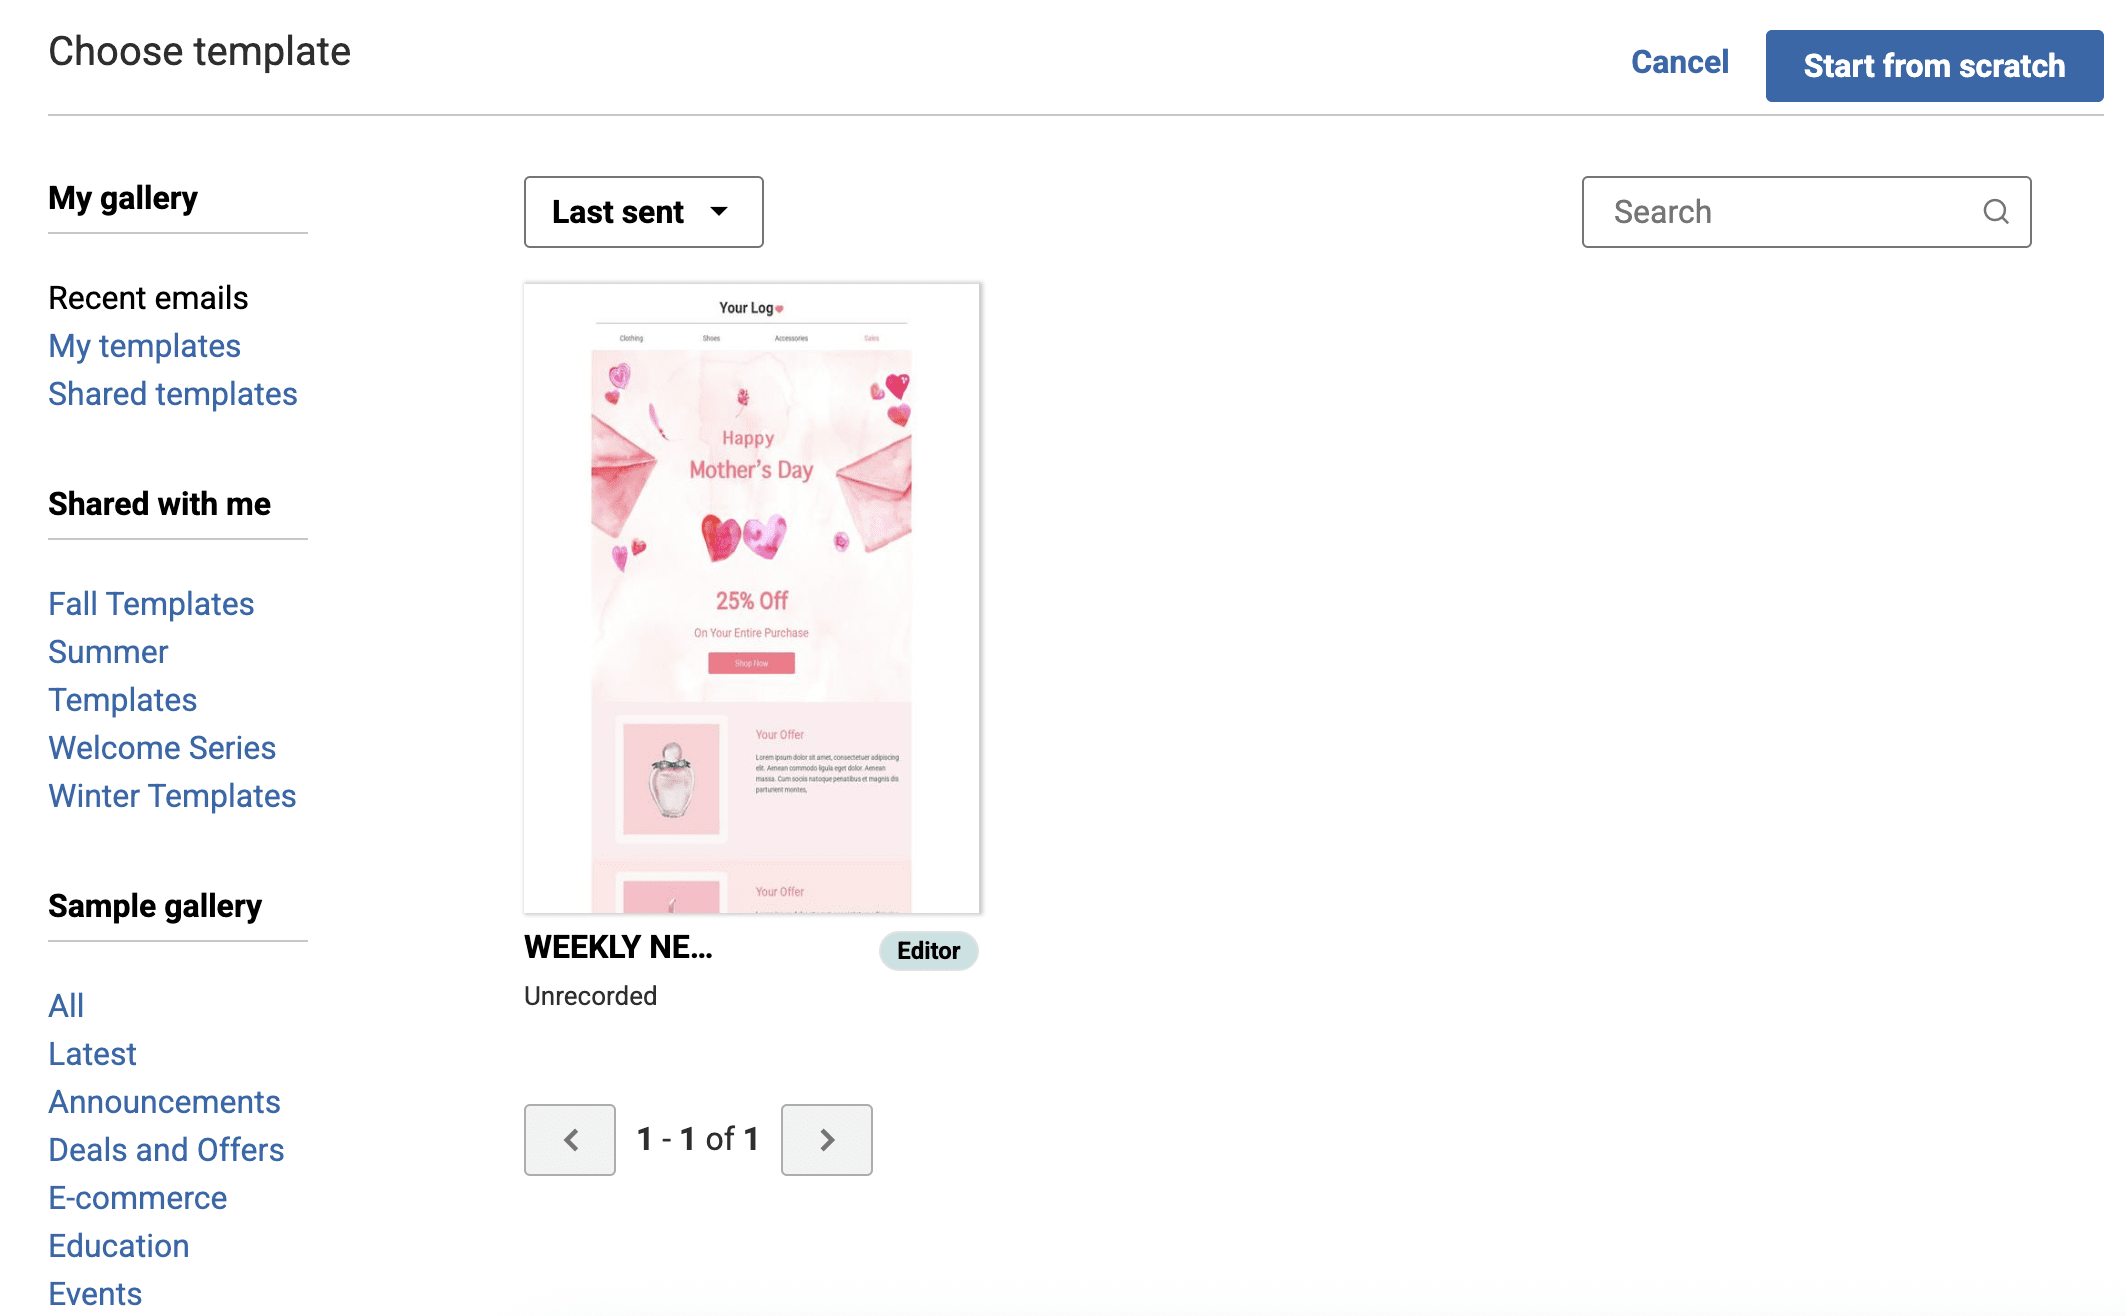
My Gallery
The “My Gallery” section contains sections for campaigns that your account has recently sent, templates that were previously created in your account, and templates that were shared with you from the parent account.
Recent Emails
In this section, you’ll find thumbnails of campaigns that were recently sent from your account. If you’d like to use one of these as your starting point, simply hover over it and click Start here.
Tip: If you find yourself repeatedly using a previously sent campaign as your starting point, consider saving that campaign as a template. Repeatedly duplicating a campaign can cause code degradation and problems rendering the campaign over time. Starting from a template will prevent code degradation and keep your campaigns looking good.
My Templates
In this section, you’ll find thumbnails of templates that a user in your account created. If you’d like to use one of these as your starting point, simply hover over it and click Start here. If you don’t have any templates saved in your account, then this section will not appear.
To create a template:
- Open a campaign in the editor.
- Click on the Save button.
- Select Save as template from the dropdown menu.
- Enter a name for the template.
- Click on the Save template button.
Shared Templates
In this section, you’ll find thumbnails of templates that were shared individually from the parent account to your subaccount. If you’d like to use one of these as your starting point, simply hover over it and click Start here. If your parent account has not shared any templates with you (or if you’re working in a standalone account), then this section will not appear.
Shared With Me
The “Shared With Me” section is specifically for folders of templates that are shared in bulk from the parent account. For example, an organization’s marketing team might share a folder of templates specifically for the “back to school” season. To open a folder, simply click on the name; inside you’ll find thumbnails of all the templates in that folder. If you’d like to use one of these as your starting point, simply hover over it and click Start here.
If your parent account has not shared any template folders with you (or if you’re working in a standalone account), then this section will not appear.
Sample Gallery
The Sample Gallery contains a myriad of example templates designed by our team that you can choose as the starting point for your new campaign draft. These templates are all mobile-optimized and fully customizable; you can use the coordinated preset text, images, and buttons as they appear in the template, or you can change it up to make it your own.
We’ve organized the Sample Gallery by use case to make it easier to find the perfect template. If you’d like to use one of these as your starting point, simply hover over it and click Start here. It will automatically redirect you to the drag and drop editor where you can customize your new campaign to fit your needs.
Start From Scratch
If you’d like to build your own template without using one of the gallery options, just click on the Start from scratch button in the upper right corner of the screen. This will open a pop-up window with two options: “Drag & drop” or “Custom HTML”.
Note: Custom HTML is only an option in subaccounts and standalone accounts. Tiered accounts cannot create custom HTML campaigns or templates in the Brand Manager.

Drag & Drop
If you choose the “Drag & Drop” option, it will open a brand new, blank campaign in the drag and drop editor. There will just be a few empty default blocks in the draft, but you can remove them, update them, and drag new blocks in to your heart’s content.
Custom HTML
If you choose the Custom HTML option, also called Code-Your-Own (CYO), it will open a brand new, blank campaign in an HTML editor. There will be some code already present, but it’s mainly just the code needed to create the basic outline of the mailing, as well as the footer. From here, you can use your own HTML code to build the campaign.
Warning: Custom HTML campaigns should only be used by those who are proficient in HTML. Custom code is entirely self-supported, so use of this tool is at your own risk.
CYO campaigns cannot be saved as templates. Previously, the legacy* editor allowed Parents and Managers of tiered accounts to use HTML to code custom templates in the Brand Manager, but this tool is no longer available in the new drag and drop editor. Existing CYO templates at the parent level are still available in accounts that have them and can still be edited and copied. However, these templates are labeled as “Legacy” and new ones cannot be created.
Preset Template Styles
All of the templates found in our template gallery come with preset styles that you can view anytime. This can be helpful when you are recreating a previous campaign and need to know what fonts or colors were used.
Drag and Drop Editor
You’ll find all of the formatting controls for the campaign in the Settings tab.

Legacy Editor
In any open legacy campaign, you can click on the View styles link found under the campaign name to see the preset style settings. A pop-up window will appear that shows the color swatches and font styles used for that campaign template.

* In April 2022, our legacy editor was replaced with a new drag and drop editor. Accounts that existed prior to this change still have access to the legacy editor through their previously saved templates and campaigns, however new, from-scratch campaigns can only be created in the new drag and drop editor. Accounts that were created after this change only have access to the new drag and drop editor. Please refer to our new editor FAQ article for more information.