This article explains how to create subaccounts in bulk.
Ⓘ Available to HQ, Essentials, Teams, and Corporate accounts
Who Can Bulk Upload Subaccounts?
Depending on your user permissions, you may not have access to the bulk subaccount creation feature.
The account Parent can always use the bulk upload subaccounts tool. However, in HQ, Teams, and Corporate accounts, Managers must have the “Can create accounts” optional permission given to them by the account Parent. Without this permission, they will not be able to use the bulk upload subaccounts tool; in fact, without this permission, they won’t be able to create subaccounts at all.
Essentials accounts do not have the Manager role, so only the account Parent can create subaccounts.
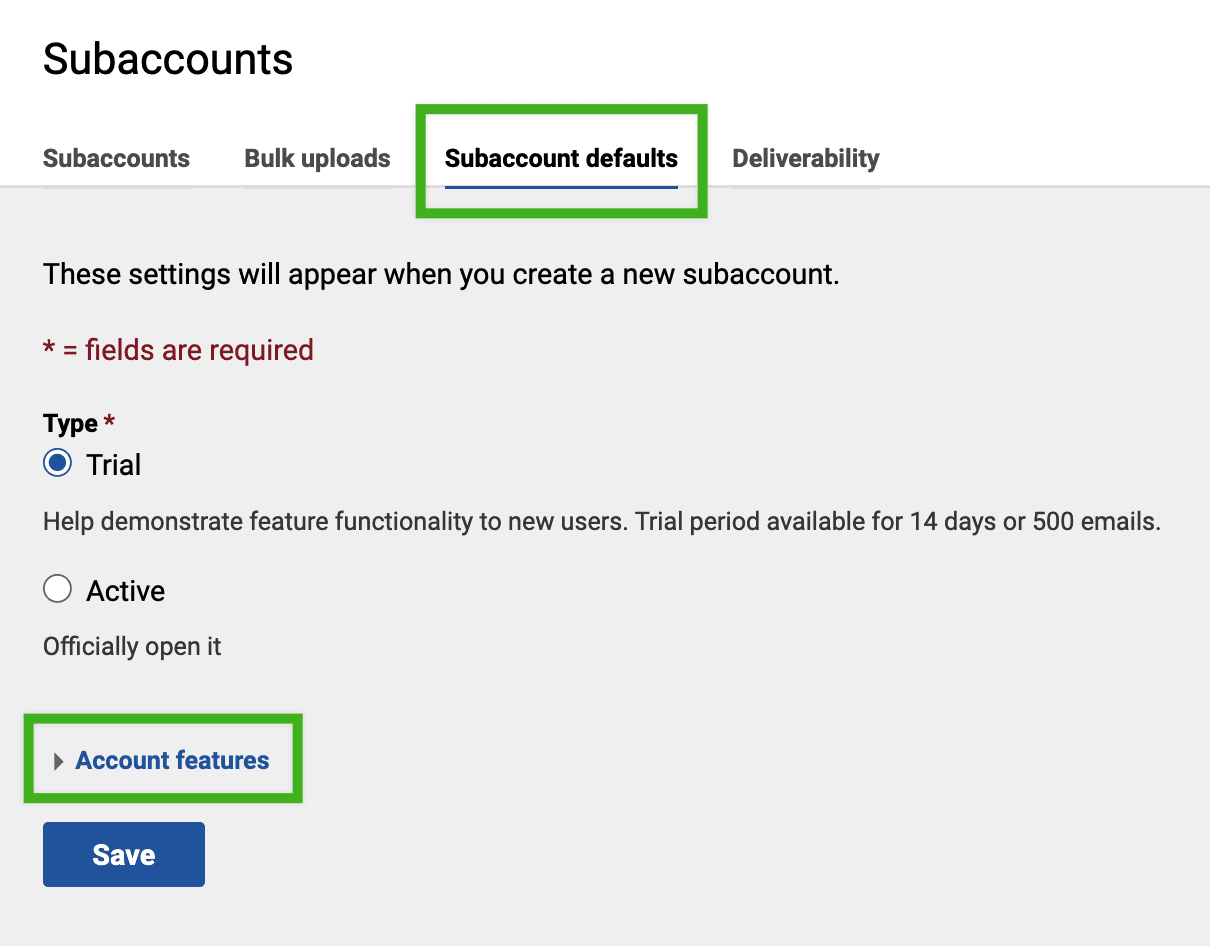
Subaccount Defaults
Before you get started, it’s important to know that all subaccounts created using the bulk upload method will be assigned the default subaccount settings that are defined in your account. If you have not set up your default settings in your account, or you want to check them, follow these steps:
- If you are in the parent account, click on the Subaccounts section at the top of the page. If you are currently in a subaccount, click on the house icon in the upper right corner of the screen and select Subaccounts from the dropdown menu.
- Click on the Subaccount defaults tab.
- Select the radio button for “Trial” or “Active”, as desired.
- Click on Account features to view more default options.
- Once you’ve made your selections, click on the Save button.
Bulk Uploading Subaccounts
Once you’re satisfied with your account defaults, follow the steps below to upload subaccounts in bulk:
- If you are in the parent account, click on the Subaccounts section at the top of the page. If you are currently in a subaccount, click on the house icon in the upper right corner of the screen and select Subaccounts from the dropdown menu.
- Click on the Bulk uploads tab.
- Click on the Bulk upload subaccounts button on the right.
- In the pop-up window that appears, click on the Download template button.
- Open the downloaded template and begin adding your information in row 2. Do not modify the column headings. The template contains the following columns:
Column heading Description Subaccount name The data entered here should be the display name you want for your subaccount. Subaccount time zone The data entered here should be the time zone the subaccount is in. Examples of acceptable time zones would be: US/Eastern, US/Central, US/Arizona, US/Mountain, UTC. Subaccount sender name The data entered here should be the default ‘sender name’ you want displayed on this subaccount’s mailings. Subaccount sender email address The data entered here should be the default ‘sender address’ you want this subaccount’s mailings to send from. Subaccount address 1 The data entered here should be the subaccount’s main physical address. Subaccount address 2 This field is optional. Subaccount city The data entered here should be the subaccount’s city. Subaccount state The data entered here should be the subaccount’s state (such as NY, CA), abbreviated or spelled out. Subaccount province The data entered here should be the subaccount’s province, if applicable. Subaccount country The data entered here should be the subaccount’s country, such as the US. Subaccount zip code The data entered here should be the subaccount’s zip code or postal code. Subaccount phone number The data entered here should be the subaccount’s phone number, no dashes required. - Save the file as a CSV. Depending on the application you’re using, you may need to choose Export as CSV instead. If you save your file as a different format and then simply change the name to include .csv, the file will not be accepted.
- Return to your email marketing account and click on the Next button in the pop-up window.
- Click on the Choose file button, select your CSV, and click on the Upload button.
- Follow the prompts to confirm the upload.
Right away, your file will be checked for formatting errors; if no errors are found, you’ll be directed to the Bulk Uploads tab. You’ll see an entry in the table that indicates your bulk upload is being processed. Processing your file may take several minutes, so you are welcome to navigate away while your subaccounts are uploaded.
Once your file has been completed, the Bulk Uploads table will indicate the number of subaccounts created, and the number of any errors that were found. If there were errors with your file, you can click on the dropdown arrow and download a summary CSV file that details those errors and also includes information on the subaccounts that were created successfully. To correct your errors, we suggest that you create a new CSV file with corrections to your data, and then upload the new file to ensure the subaccounts that weren’t created are added successfully.
Tip: If you correct your data using your original file that still includes the subaccounts that were successfully created and you upload that file again, duplicates of those accounts will be made.
Frequently Asked Questions About Bulk Uploads
What file format do I need to use to bulk upload accounts?
Your file must be in a CSV format.
When I bulk upload subaccounts, what users will be assigned to those accounts?
The account Parent and any Managers that have their permissions set to ‘all current and future subaccounts’ will be automatically assigned to any new subaccounts created. To add other users, access the Users section, choose a user to update, and search for the relevant subaccounts in the Subaccount Access tab.
What if I want to create some subaccounts as a trial and some subaccounts as active?
The bulk process will assign the account status that has been chosen in your Subaccounts Defaults tab. However, you can adjust your default settings to Trial, upload your file, and then adjust them back to Active and upload a separate file.
Where can I find my new subaccounts once they have been uploaded?
The new subaccounts created will appear in the list of subaccounts. Select Subaccounts in the top navigation menu, and use the search functionality to locate a particular sub.
Can I create internal subaccounts in bulk?
No, internal subaccounts must be created one at a time.