This article explains how to add personalization to your campaigns created in the legacy editor.
Personalization Overview
Personalization is when you add specific information about the person receiving your campaign to the actual content of the mailing. When done well, personalized campaigns can impress your contacts and increase your response rates. You can personalize your campaign in a number of ways using the information you’ve stored about contacts in your account.
Personalization tags are placeholders that get replaced with real values at the time the campaign is sent. The real values can represent your account’s contact fields, like first name, email, or the latest item they ordered. You can also use personalization tags in the subject line, sender email, and reply-to email.
Tip: Always send a test of your campaign to ensure that your personalization tags are working as expected.
Adding Personalization to a Legacy Campaign
Campaign Body
Personalization tags can be used in text blocks, combination blocks, and button blocks. To add personalization to your campaign, click on one of these blocks and drag it to the desired spot in your campaign. Then, follow the steps below:
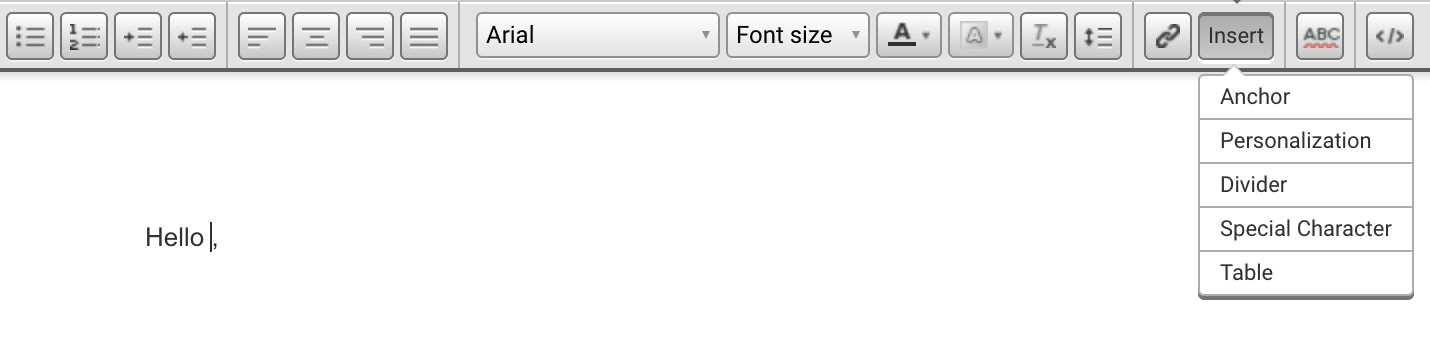
- Click inside the block to edit it.
- In the toolbar, click on Insert and choose Personalization from the dropdown menu.
![]()
- Click on the “Field” dropdown and select the desired field from the list.

- Type your default text in the “Placeholder” field.
The default value acts as placeholder text in case a contact has an empty field. In that case, the placeholder text is used instead so that there isn’t an obvious gap in your copy.
Subject Line
Personalization tags can also be used in a mailing’s subject line.
- In a campaign draft, click on the Review & Send button.
- Click in the “Subject line” field.
- Type the desired personalization tag.
Sender Email and Reply-To Email
To add personalization to your sender email or reply-to email:
- In a campaign draft, click on the Review & Send button.
- Click in the “Sender email” or “Reply-to” field.
- Type the desired personalization tag.
Warning: When using personalization tags for the sender email or reply-to email, you must use a valid email address as the default value or your email will not be able to send.
Advanced Personalization Options
In addition to personalizing a campaign with data from your contact records, you can personalize with links that allow your contacts to manage their preferences, opt-out of mailings, confirm their subscription, and link to a signup form. These options are also listed on the “Field” toolbar in the dropdown menu, and selecting one will insert that functionality as a link right in your content. You can also add these as hyperlinks behind text – just type or paste one of the below tags into the URL field.
- To create a link to manage preferences, use:
[% manage_url %] - To create a link to opt out, use:
[% unsub_url %] - To create a link to confirm subscription, use:
[% optin_confirm_url %] - To create a link to your default signup form, use:
[% signup_url %]
You can find a list of other common personalization tags in our Standard Personalization Tags article and our Using a Code-Your-Own (CYO) Campaign article.
Personalized URLs
You can also create personalized URLs (PURLs) for your recipients. PURLs are commonly used to link to a contact-specific web page or promotion, where each contact has a unique ID that completes a URL. They work in any location where you would normally add a link in your campaign.
PURL Syntax
PURLs can use two different forms of personalization tags: “double bracket” tags and “bracket-percent” tags. Standard personalization, as described above, uses bracket-percent tags. When deciding whether to use double bracket tags or bracket-percent tags, there are a couple things to keep in mind:
Click Tracking
Double bracket PURLs will track clicks. Bracket-percent PURLs will not track clicks.
Timing
Double bracket PURLs pull the information that is used to create the link at the time of click, not the time of send. Because of this, if the information in the member record changes, the link will change along with it, since it’s not printing the information into the email, but rather checking back with your account to get the information at the time of click.
Bracket-percent PURLs pull the information that is used to create the link at the time of send, not the time of click. If you anticipate that the information in the member record will change, it may be better to use the bracket-percent method.
Field Format
If you’re using personalization to create the entire URL, not just a portion of it, then the link in your contact field CANNOT contain http:// or https://. Our system will add that automatically, so if the link in your contact field includes http:// or https://, it will break the link.
Consistent Syntax
Personalization tags MUST be consistent through the entire URL, so you cannot choose both formats; you must choose one or the other. For example:
https://foo.com/?q=[[email]]&c=[% member:city default=“city” %]WILL NOT WORKhttps://foo.com/?q=[[email]]&c=[[city]]WILL WORK
Default Format
Double bracket tags and bracket-percent tags use different syntax for default values.
Double bracket tags use :default_value as their syntax. For example, [[city:nashville]] – if a contact’s field is empty, “nashville” will be used as the placeholder text.
Bracket-percent tags use default="value" as their syntax. For example, [% member:city default="nashville" %] – if a contact’s field is empty, “nashville” will be used as the placeholder text.
Creating a PURL
- Navigate to your Audience tab.
- Click on the Contact fields section in the panel on the left.
- Click on the Create contact field button on the right and follow the steps to create the field that will hold the unique part of the URL. If you plan to use an existing field, you can skip this step.
- Click on the name of the field to see its shortcut name. You’ll need this for later, so be sure to write it down or remember it.

- Import the unique URL value to each contact’s record. Be sure to choose “Add & update” as your import type.
- To create the PURL, you’ll use the field’s shortcut name to create a personalization tag in the correct spot within the URL. For example, if the shortcut name is coupon-code,
- Double bracket tags: The tag will be formatted as
[[coupon-code:1234]]. This code is replaced with the unique value for each recipient and can be added onto the static part of the URL, like this:www.example.com/[[coupon-code:1234]]. - Bracket-percent tags: The tag will be formatted as
[% member:coupon-code default="1234" %]. This code is replaced with the unique value for each recipient and can be added onto the static part of the URL, like this:www.example.com/[% member:coupon-code default="1234" %].
- Double bracket tags: The tag will be formatted as
- Once you have the PURL built, you can insert it as a link just like you’d link to a normal website.
Using an Email Address in a PURL
If you’d like to use an email address within a PURL, just use this personalization tag: [[email]]
For example, if your URL uses a recipient’s email address as the unique part of the URL, like this: www.example.com/email_address/special, then the PURL for the example would be: www.example.com/[[email]]/special.
* In April 2022, our legacy editor was replaced with a new drag and drop editor. Accounts that existed prior to this change still have access to the legacy editor through their previously saved templates and campaigns, however new, from-scratch campaigns can only be created in the new drag and drop editor. Accounts that were created after this change only have access to the new drag and drop editor. Please refer to our new editor FAQ article for more information.