This article explains how to edit an automated campaign in the workflow builder or in the Campaigns tab.
You can edit automated campaigns in two places, the Campaigns tab or the Automation tab, without pausing the workflows using them.
Editing a Mailing in the Automation Tab
- Navigate to your Automation tab.
- Click on the name of the workflow that contains the mailing that you want to edit.
- Scroll down until you find the mailing in question.
- Click on the mailing’s name.
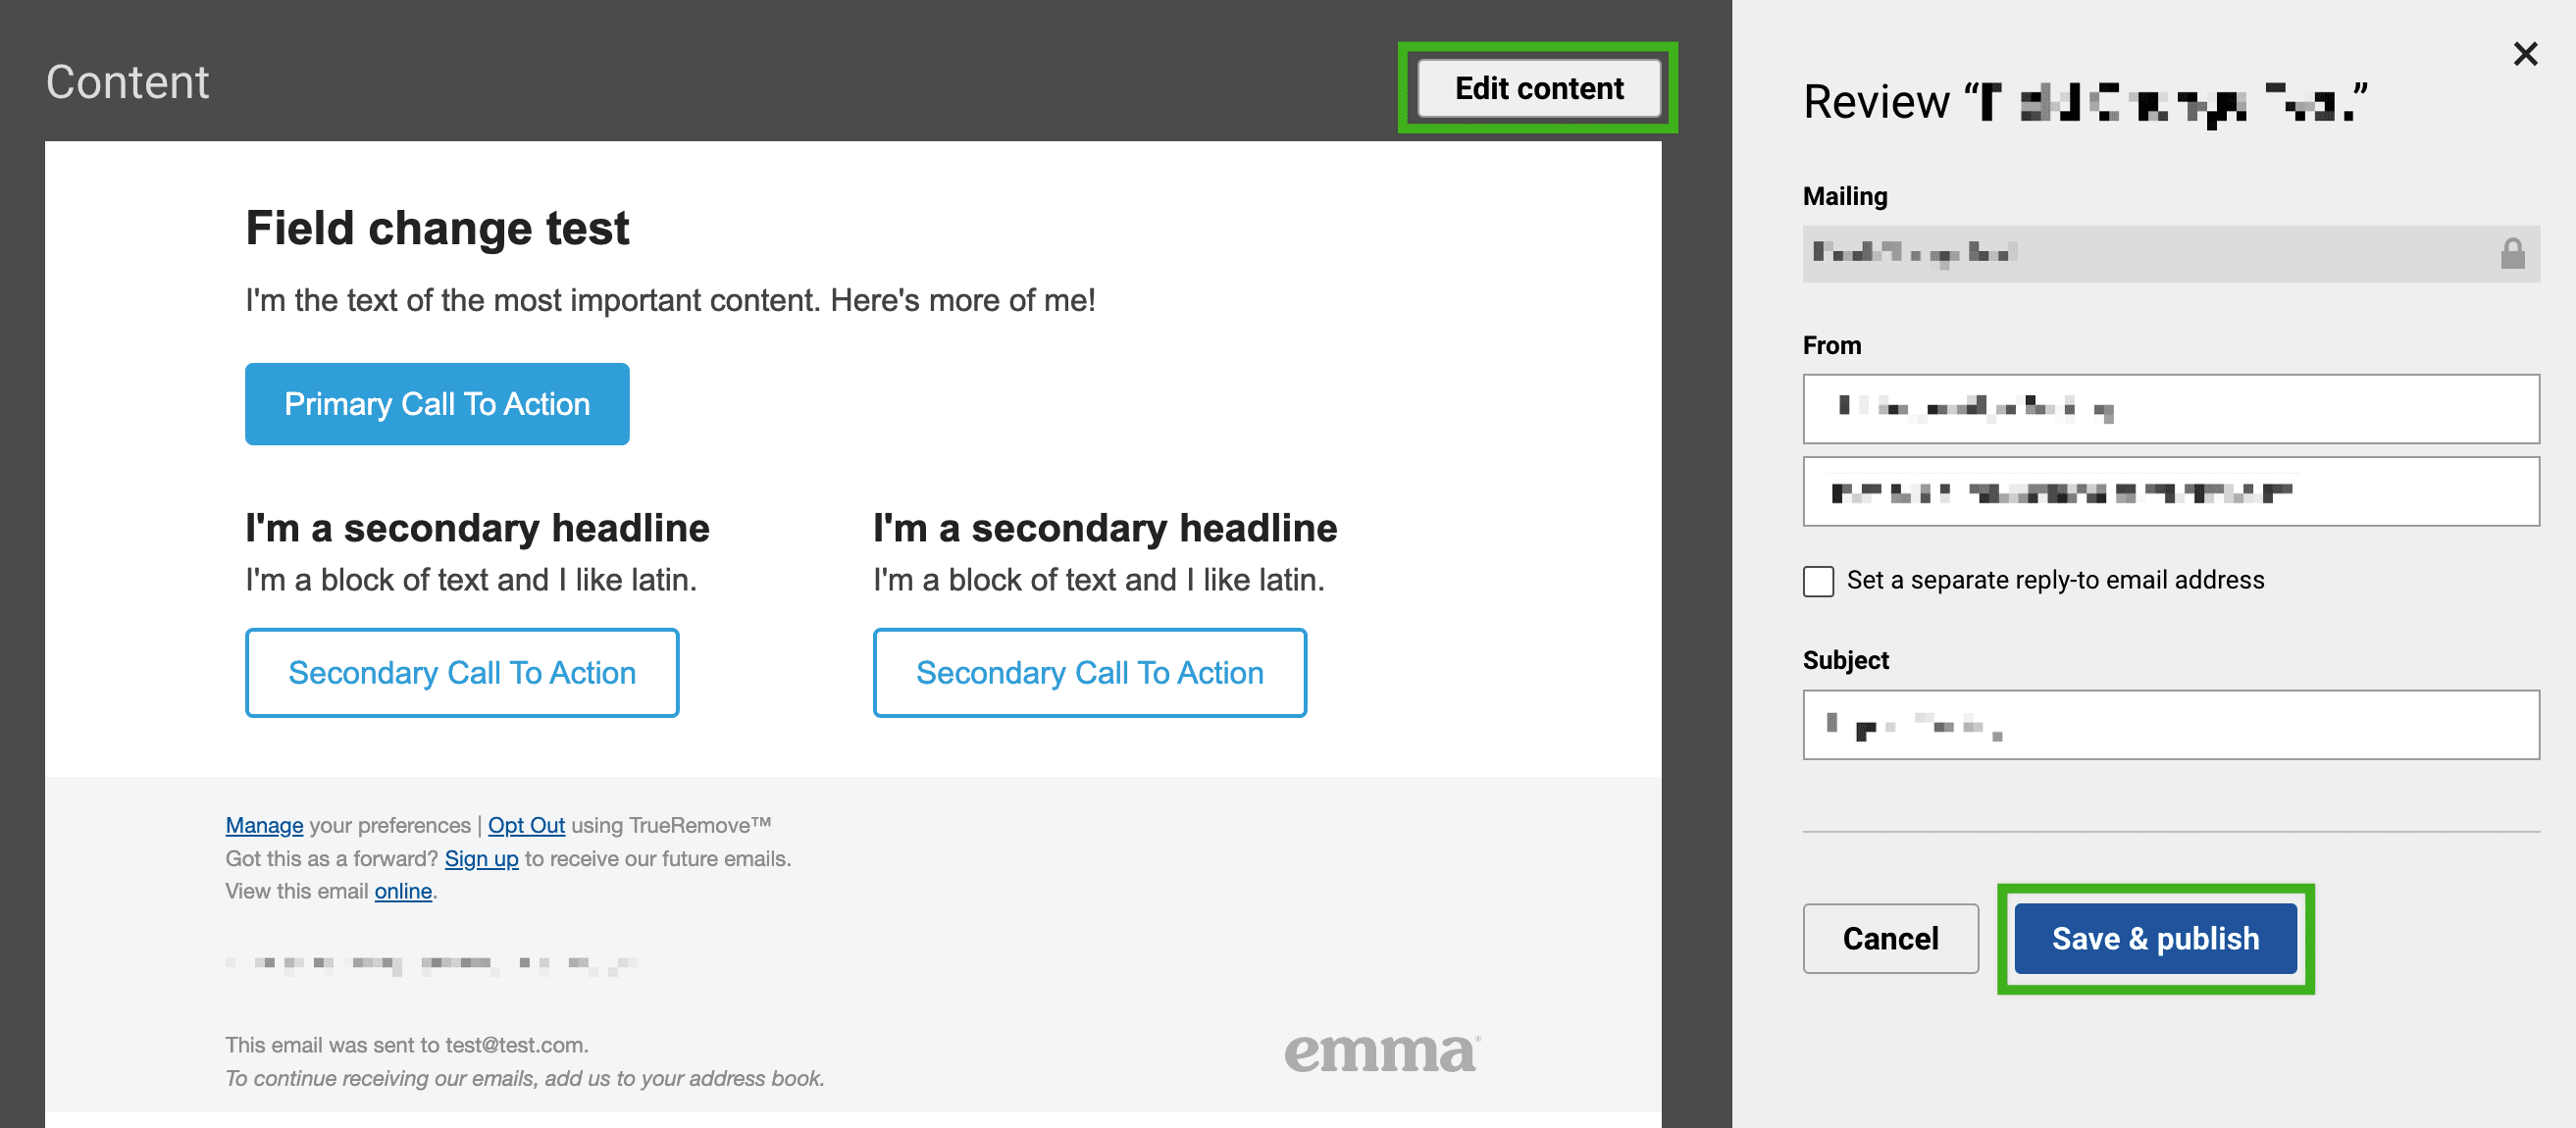
- In the pop-up window that appears, edit the “From name”, “From email”, “Reply-to email”, or “Subject”.
- If you’re satisfied, click on the Save & publish button. Or, to edit the mailing’s content, click on the Edit content button.
![]()
- In the pop-up window, click on the Continue button.
- Make any desired changes to the mailing’s content.
- Click on the Save & review button.
- Click on the Save & publish button.
- Click on the Save workflow button.
Editing a Mailing in the Campaigns Tab
- Navigate to your Campaigns tab.
- Click on the Automated tab.

- Click on the name of the mailing that you want to edit.
- In the pop-up window that appears, click on the Continue button.
- Make any desired changes to the mailing’s content.
- Click on the Save & review button.
- In the pop-up window that appears, click on the Publish edits button to apply your changes.
Note: If you edit an automated campaign without publishing your changes, an “Unsaved changes” icon will appear next to that mailing’s name in the Campaigns tab.
