This article explains how to select an audience and schedule or send a campaign.
Once you have finished creating a new campaign, you’re ready to review it, make your final decisions, and schedule or send it. Here we’ll go over all the steps between the moment you finish editing your campaign and the moment you schedule or send it.
Tip: Always be sure to send a test of your campaign before sending it out to the intended audience.
Creating a New Campaign
The rest of the instructions in this article are for post-campaign creation, but if you haven’t already created one, follow these instructions to get started.
- Navigate to your Campaigns tab.
- Click on the Emails section in the panel on the left, if you’re not there already.
- Click on the Create new campaign button on the right.
- In the pop-up window that appears, select Regular email and give your campaign a name.
- Click on the Continue button.
- Select a template or click on the Start from scratch button.
- If you chose to start from scratch, select Drag & drop in the pop-up window that appears and click on the Continue button.
Parts of the Review Page
When you’re happy with your campaign, click on the Review button at the top right. This will bring you to the Review page, where you can choose your audience, subject line, preheader text, and more.
The “Send time”, “Audience”, “Subject”, and “From” sections are all required. Once you’ve filled out a required section, a green checkmark will appear next to the section heading.
Note: If you’re working in the legacy* editor, you’ll need to click on the Review & send button instead. This will bring you to the legacy Review page.
Send Time
You can choose to send your campaign now or schedule it for later.
- Click on the Send time dropdown arrow.
- Select Send now, Schedule for later, or Smart Send.
- If you chose Schedule for later, click on the date and use the calendar to select the desired send date and time.
The send time is based on the time zone set in your account. To change your time zone, click on the gear icon and select Account. Use the dropdown menu to select a time zone. Parents and Managers of tiered accounts will need to click on the gear icon, scroll down to “Subaccount settings”, and then select Account from the dropdown menu.
Warning: After you have scheduled a campaign for a future date or time, you can still make edits before the send time arrives. However, it is not possible to stop, recall, or edit a sent email after it has left our servers.
You can choose to enter one or more email addresses that will be notified when the scheduled email sends. When a scheduled mailing begins sending, those email addresses will receive a head’s up email, which is just a preview image of the campaign that’s about to start sending and not the email itself.
The image shown in the head’s up email is just a preview of the campaign, not the actual mailing. As a result, the links shown in the preview image will not work when clicked.

Smart Send
Smart Send is a feature that analyzes open activity from your email campaigns over the past six months and identifies the hour with the highest open volume to determine the best time to send. Once the time is calculated, use the calendar to select the send date. You must have sent at least 3 mailings in order for the Smart Send tool to work. Smart Send is available to contracted Lite, Essentials, Teams, and Corporate accounts only,
Audience
Click on the Audience dropdown arrow to select the desired groups, segments, or subscriptions. You can also type in an individual email address as a recipient. The chosen groups, segments, and subscriptions are refreshed at the time of sending to ensure your campaign is sent to the current audience.
Note: If you send a campaign to a group and a subscription, active contacts who are in the group will still receive the mailing, even if they are unsubscribed from the subscription.
You also have the option to exclude select contacts in your audience. To select exclusion segments, click on the Excluding anyone in dropdown menu and choose the desired segments. After the campaign has been sent, you can refer to your Response page to see which segments were not included by selecting the Excluded tab.

Subject Line
Type in your subject line or click on the Switch to split test button. Split testing, also known as A/B testing, is a way of working out which of two options is the most effective in terms of encouraging opens and is something we always suggest trying. You can click on the emoji button to add an emoji to your subject line, if desired.
To add personalization to your subject line, click on the Personalize button, select the desired field, enter a default value, and click on the Save button.
Preheader text is a brief description of what’s in your email. It’s not displayed in the email itself, but appears in the email preview of most inboxes, following the subject line. While preheader text is not required, if you don’t write anything, inboxes that show this text will pull it from the first line of text in the plaintext version of your mailing.

Smart Subject
Smart Subject uses AI to generate subject lines based on a campaign’s content and proven best practices.
- Click on the Smart Subject button.
- Click on the dropdown menu to select a tone for your subject line.
- Optional: Check the box next to “Include preheader text” if you also want to generate preheader text.
- Click on the Generate Smart Subjects button.
- Click on your preferred subject line or click on the Refresh button to generate new options.
- Once you’re satisfied with your choice, click on the Select button.
From
The name and email address in your account’s sender details will populate in the fields for the sender name and sender email. You can keep what’s there or click on the dropdown arrow to enter in new details that may be pertinent to this campaign. You can also add a unique reply-to address by checking the Set a separate reply-to email address box. Additionally, it gives you the option to overwrite these default sender details for your account and set the updated information as the new default, so be sure if you make this selection that it is what you want for all of your campaigns moving forward.

Advanced
Click on the dropdown arrow in the Advanced section to view the “Format”, “Signup form”, and “Google Analytics” settings.
Format
Choose between sending an HTML campaign and a plaintext only campaign. We always recommend choosing the HTML format, as our system will send the plaintext version as a last resort if the HTML version cannot be delivered.
Signup Form
If you have more than one signup form, you will see them as options when you click the dropdown menu under “Signup form”. You can keep the default form or you can choose a different one from the dropdown menu. The signup form that you select will be what’s included in the footer of your campaign.
Google Analytics
If you would like to add Google Analytics to your campaign, simply click on the Add Google Analytics button and follow the prompts. Connecting Google Analytics is not required and is completely voluntary.

Smart Recommendations
Smart Recommendations, available to contracted Lite, Essentials, Teams, and Corporate accounts, is a feature that evaluates your campaign’s send time, subject line, preheader text, and sender information and provides real-time, actionable advice before you send. The guidance offered by Smart Recommendations is designed to help increase engagement, strengthen deliverability, and boost open rates.
- Complete the “Send time”, “Audience”, and “Subject” fields.
- Click on the Smart Recommendations button.
- Review the suggestions and make changes, if desired.
To collapse the Smart Recommendations box, click on the dropdown arrow in the upper right corner. To refresh the suggestions, click on the Refresh button.
Note: These suggestions are advisory only. You may ignore them and continue sending your campaign, if desired.
Sending or Scheduling a Campaign
Once you’ve made your selections, click on the Review & send button at the top right. In the pop-up window that appears, review all the information to confirm that it’s correct, then click on the Send campaign button or the Schedule campaign button. To make changes before sending, click on the Cancel button.
Legacy Review Page
Recipients
You can select to send to groups, segments, subscriptions, or individuals. The chosen groups, segments, and subscriptions are refreshed at the time of sending to ensure your campaign is sent to the current audience. To add some, either start typing a name into the field, or click the person icon on the right to display your full list of each option.

Exclude a Segment
You also have the option to exclude select contacts in your audience by checking the Exclude an audience segment box. Click on the dropdown menu that appears to select a segment. You can only select one exclusion segment, so if you need to select multiple, we recommend creating a new segment that combines the criteria of the existing segments that you’d like to use.
After the campaign has been sent, you can refer to your Response page to see which segment was not included by selecting the Excluded tab.
Subject Line
Type in your subject line or click on the Switch to split test button. Split testing, also known as A/B testing, is a way of working out which of two options is the most effective in terms of encouraging opens and is something we always suggest trying. You can also add an emoji to your subject line, if desired.
Warning: Legacy* subject line split tests cannot be sent to subscriptions, only to groups or segments.
Preheader Text
Preheader text is a brief description of what’s in your email. It’s not displayed in the email itself, but appears in the email preview of most inboxes, following the subject line. While preheader text is not required, if you don’t write anything, inboxes that show this text will pull it from the first line of text in the plain-text version of your mailing, which isn’t always a good look.
Sender and Reply-To Details
In this area, the name and email address that you have listed as the sender details for your account will populate in the fields for the sender name and sender email. You can keep what’s there or enter in new details that may be pertinent to this campaign, or you can also add a unique reply-to address. Additionally, it gives you the option to overwrite these default sender details for your account and set the updated information as the new default, so be sure if you make this selection that it is what you want for all of your campaigns moving forward.
Select a Signup Form
If you have more than one signup form, you will see them as options when you click the dropdown menu under “Signup form”. You can keep the default form or you can choose a different one from the dropdown menu. The signup form that you select will be what’s included in the footer of your campaign.
Google Analytics
If you would like to add Google Analytics to your campaign, simply click on the Add Google Analytics button and follow the prompts. Connecting Google Analytics is not required and is completely voluntary.
Send Now or Schedule
You can choose to send your campaign right away by clicking the Send now button, or select Schedule for later to choose a send time in the future.
The send time is based on the time zone set in your account. To change your time zone, click on the gear icon and select Account. Use the dropdown menu to select a time zone. Parents and Managers of tiered accounts will need to click on the gear icon, scroll down to “Subaccount settings”, and then select Account from the dropdown menu.
Warning: After you have scheduled a campaign for a future date or time, you can still make edits before the send time arrives. However, it is not possible to stop, recall, or edit a sent email after it has left our servers.
Scheduling Notifications
When scheduling your campaign, you will be given the option to receive a notification email once it starts. You can add multiple emails if your team members need to be notified as well. Make your selections and then click the Schedule it button. When a scheduled mailing begins sending, you will receive a head’s up email, which is just a preview image of the campaign that’s about to start sending and not the email itself.
The image shown in the head’s up email is just a preview of the campaign, not the actual mailing. As a result, the links shown in the preview image will not work when clicked.
“Preparing to Send” Screen
After you send a mailing, you’ll be directed to the “Preparing to send” screen. This screen confirms that your audience will begin to receive the mailing within roughly 30 minutes. It will also list any new contacts who were added to your audience as part of this mailing and give you the opportunity to add them to a group.
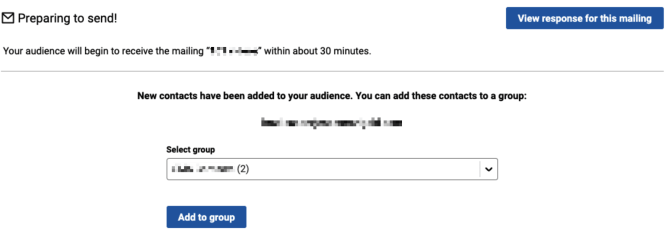
Note: The “new contacts” message will appear even if you did not add any new contacts to your audience during the sending process. The function of this is just to give you an opportunity to add all these contacts to the same group. If you see this message, but didn’t add any new contacts, there’s no need to be alarmed – this is expected.
How to Edit a Scheduled Campaign
When you schedule a mailing to send later, you can still make changes to it before it sends but you will need to cancel the send time first.
- Navigate to your Campaigns tab.
- Click on the Emails section in the panel on the left, if you’re not there already.
- Click on the Scheduled tab.
- Click on the dropdown arrow that corresponds to the mailing in question and choose Cancel send from the list.
- Click on the Drafts tab and click on the name of the campaign that you just canceled.
- Make the desired changes and when you’re ready, follow the steps to review and schedule the mailing again.
Frequently Asked Questions About Sending Campaigns
Can I edit or recall an email once it has been sent?
No, it is not possible to stop, recall, or edit a sent email after it has left our servers. For a list of reminders to help prevent mistakes, see our pre-send campaign checklist.
Why don’t the links work in my head’s up email?
The image shown in the head’s up email is just a preview of the campaign, not the actual mailing. As a result, the links shown in the preview image will not work when clicked.
If I send a campaign to a group and a subscription, will contacts who have unsubscribed from the subscription receive it?
It depends. If the contacts are also present in the group, then yes, they will receive the mailing. If they are not present in the group, then they will not receive the mailing.
Can I prevent certain contacts from receiving a campaign?
Yes, you can choose an exclusion segment on the Review page.
How can I change my sender name and email?
Please refer to our article about changing your sender name and email address.
What data does Smart Send use to select the best send time?
Smart Send analyzes open activity from your email campaigns over the past six months and identifies the hour with the highest open volume to determine the best time to send.
Will Smart Send work if I haven’t sent any campaigns in the past 6 months?
Yes, as long as you have sent at least 3 campaigns in the past 18 months. If you have not sent any campaigns in the past 6 months, Smart Send will pull information from the 10 most recent campaigns from the past 18 months. If you have sent fewer than 3 campaigns in the last 18 months, then Smart Send will not work.
Does Smart Send use data from all subaccounts or each individual subaccount when choosing the best send time?
Smart Send only uses data from the individual subaccount when choosing the best send time.
How does Smart Subject generate subject lines?
Smart Subject analyzes the content of your email and applies established subject line best practices to generate high-quality suggestions.
Do I have to use the suggestions from Smart Send, Smart Subject, or Smart Recommendations?
No, you do not. These tools are all optional, so you’re welcome to use, modify, or disregard their suggestions.
Will subject lines generated by Smart Subject include personalization?
When appropriate, subject line suggestions may include personalization tags to help make messages more relevant to your audience. These personalization tags will also include default values, which you can change once the Smart Subject has been added.
Can Smart Subject be used with split tests?
No, not at this time.
What email content is used by Smart Subject to generate the subject line?
Smart Subject analyzes the full email content.
* In April 2022, our legacy editor was replaced with a new drag and drop editor. Accounts that existed prior to this change still have access to the legacy editor through their previously saved templates and campaigns, however new, from-scratch campaigns can only be created in the new drag and drop editor. Accounts that were created after this change only have access to the new drag and drop editor. Please refer to our new editor FAQ article for more information.